The true cost of “affordable” patio furniture is measured in replacements; a materials-first approach focusing on defeating specific failure mechanisms is the only path to long-term value.
- Cheap sets fail due to predictable mechanisms: oxidation (rust), UV degradation (fading/cracking), and moisture entrapment (rot/mold).
- Engineered solutions like powder-coated aluminum, high-density polyethylene (HDPE), and properly sealed teak offer lifespans that dramatically lower the total cost of ownership.
Recommendation: Before buying, identify the primary environmental stressor in your area (e.g., salt, sun, moisture) and invest in the material specifically engineered to resist that point of failure.
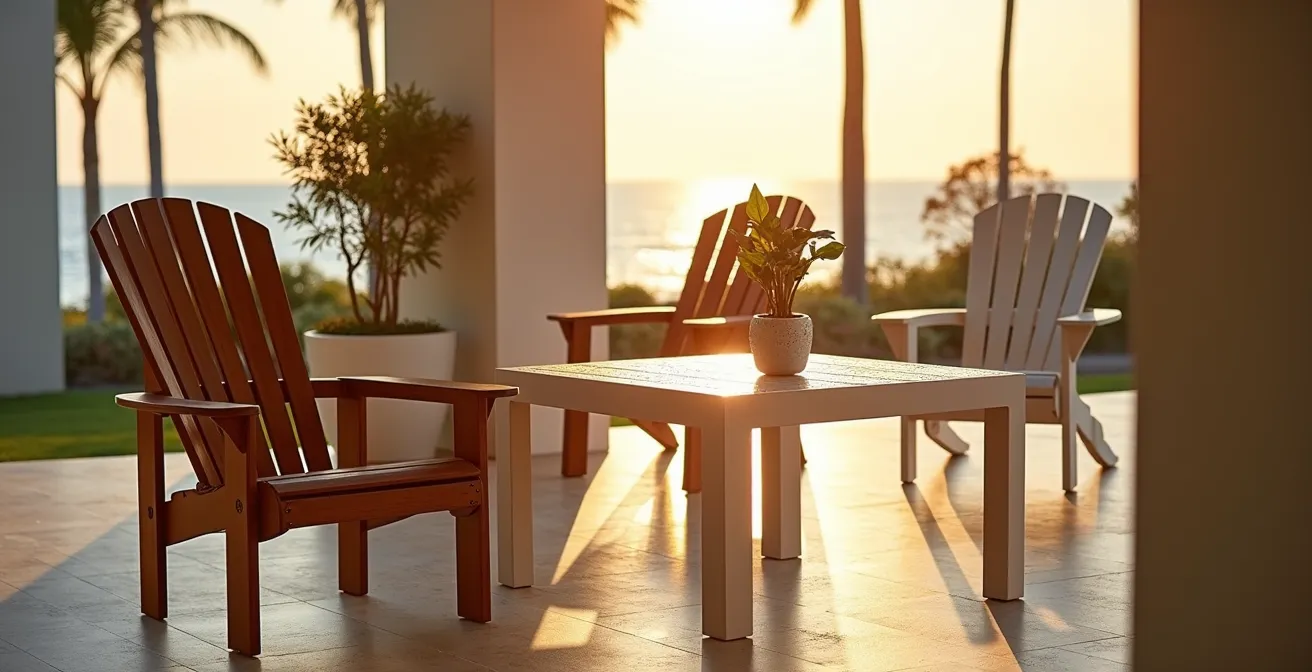
For many homeowners, the patio furniture lifecycle is a frustrating and expensive loop: buy an affordable set from a big-box store, watch it rust, fade, or fall apart within two seasons, and repeat. This cycle is often accepted as the cost of enjoying an outdoor space. The common advice revolves around generic tips like “cover your furniture” or “choose weather-resistant materials,” but this rarely prevents the inevitable decline into a curbside heap.
The core issue isn’t a lack of options, but a misunderstanding of the enemy. Outdoor furniture is in a constant battle with environmental stressors: UV radiation, moisture, salt spray, and temperature swings. Each material has a specific, predictable point of failure when exposed to these elements. The cheap price tag on mass-market sets is a direct result of cutting corners on the very engineering meant to combat these failure mechanisms.
But what if the key wasn’t just picking a “good” material, but understanding the science of why materials fail and how to choose an engineered solution for true longevity? This guide moves beyond surface-level advice. As a materials engineer, we will dissect the common failure points of outdoor furniture and analyze the properties that allow certain materials to survive a decade or more of harsh weather, delivering a superior return on investment.
This article provides a detailed analysis of material science and maintenance protocols. By understanding these principles, you can shift from being a repeat buyer to a long-term investor in your outdoor living space.
Summary: Analyzing Outdoor Furniture for True Long-Term Value
- Why buying “big box” store patio sets costs you double over 5 years?
- How to clean and seal teak furniture to prevent graying and rot?
- Cast Aluminum vs. Wicker Resin: which withstands coastal salt air better?
- The winter cover error that causes mold growth on your expensive cushions
- Restoring powder-coated metal: a solution to fix chips before rust spreads
- The mechanical failure point to check before buying cheap modular furniture
- Swimming pool vs. Outdoor kitchen: which adds more actual value to a family home?
- Solar Lighting for Pathways: How to Achieve Professional Curb Appeal DIY?
Why buying “big box” store patio sets costs you double over 5 years?
The appeal of an all-in-one patio set for a few hundred dollars is undeniable. However, this low initial cost masks a much higher Total Cost of Ownership (TCO). From a materials engineering perspective, these products are designed for price, not performance. They utilize materials at their absolute minimum tolerance: thin-walled steel tubing with a flash of paint, untreated softwoods, and low-grade plastics with insufficient UV inhibitors. The result is a predictable failure timeline. The steel begins to show rust stains after the first few rainstorms, the wood splinters, and the plastic becomes brittle and fades.
This rapid degradation forces a replacement cycle every 2-3 years. A $400 set replaced every two years costs $1,000 over a five-year period, not including the time and frustration of disposal and re-assembly. In contrast, a well-engineered piece made from materials like High-Density Polyethylene (HDPE) or properly treated teak may have an initial cost of $800 but will last for over a decade with minimal maintenance. Properly maintained quality pieces can last 10–20 years, completely breaking the replacement cycle.
The economic equation is clear. High-quality materials offer a significantly lower TCO. For instance, research shows that high-density polyethylene furniture typically lasts over 15 years, a stark contrast to the 2-8 year lifespan of cheaper PVC plastics used in big-box sets. Investing in superior materials is not a luxury; it’s a calculated financial decision that pays for itself by eliminating the recurring cost of replacement.
How to clean and seal teak furniture to prevent graying and rot?
Teak is prized for its high natural oil content, which provides inherent resistance to water and insects. However, when left untreated, teak’s primary failure mechanism is not structural rot but aesthetic and surface-level degradation. Exposure to UV radiation and rain leaches these surface oils, causing the wood to oxidize and develop a silvery-gray patina. While some prefer this look, it can also make the wood more susceptible to dirt and mildew if not cleaned.
Preventing this graying and protecting the wood’s rich, honey-colored state requires a proactive sealing process. This is not the same as oiling; sealing creates a protective barrier on the surface, locking in the color and blocking moisture and UV rays. A proper sealing protocol is a multi-step engineering process designed for long-term protection.
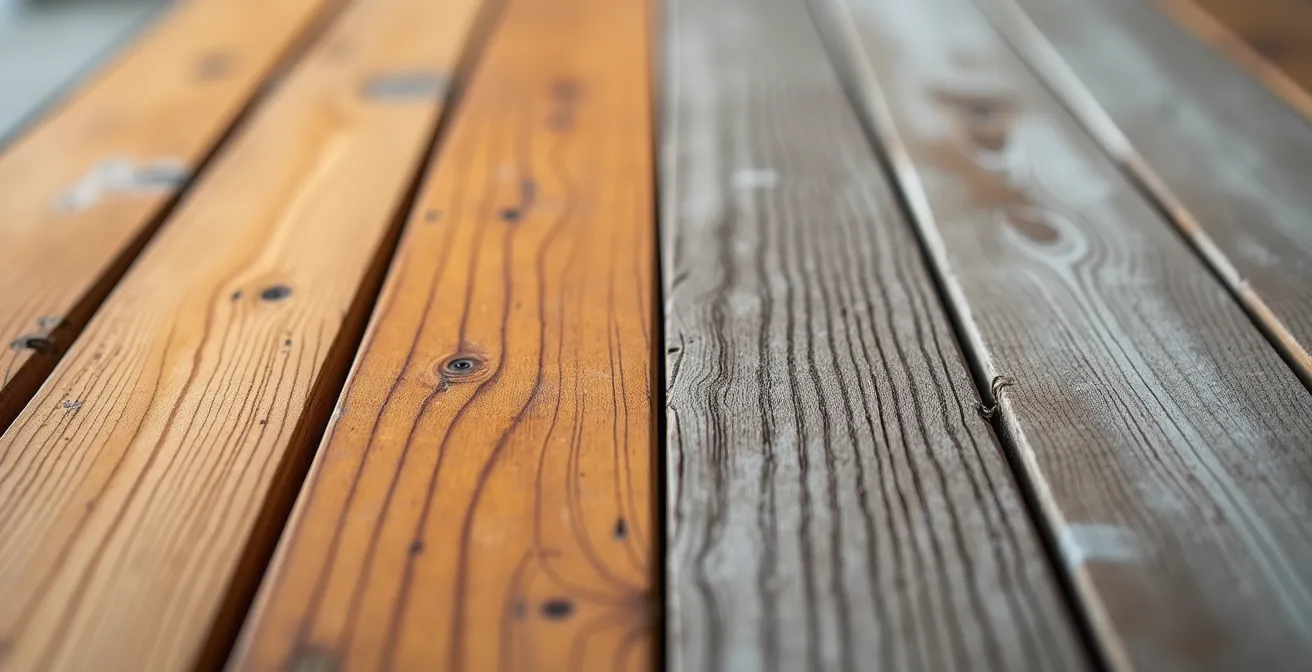
As the comparison shows, the difference between sealed and weathered teak is significant. To maintain the golden color and prevent the onset of the gray patina, follow this precise three-step process:
- Grain Opening: Leave new teak furniture in direct sun for approximately two weeks. This initial curing period opens the wood grain and allows excess natural oils on the untreated surface to leach out, creating a better surface for the sealer to adhere to.
- First Coat Application: After cleaning the surface, spray on a high-quality teak sealer. Use a lint-free cloth to rub it in, ensuring even coverage. This initial coat penetrates the open wood grain.
- Second Coat and Curing: Apply a second coat after the first application has been absorbed. This sealing process “locks” in the current color for about a year. For maximum protection, after the sealer has fully cured, you can lightly sand the surface and apply two coats of a teak-specific clear coat to add a hard-wearing top layer.
Cast Aluminum vs. Wicker Resin: which withstands coastal salt air better?
Coastal environments represent a uniquely hostile challenge for outdoor materials. The combination of high humidity, intense UV radiation, and, most importantly, airborne salt particles (salt spray) accelerates material degradation significantly. Salt acts as an electrolyte, dramatically speeding up the oxidation (rusting) process in metals and can be abrasive to other surfaces. When choosing furniture for these areas, the selection is not about which material is “best” but which is best engineered to defeat saline corrosion.
Florida’s coastal regions represent the most corrosive in the continental United States, with Cape Canaveral cited as the most corrosive atmospheric environment.
– Construction Specifier, Selecting aluminum finishes for coastal areas
Cast aluminum and HDPE (High-Density Polyethylene) resin wicker are two top contenders for coastal durability, but they resist salt through different mechanisms. HDPE resin wicker is inherently inert; it’s a solid polymer that is impervious to moisture and salt. Its main challenge is UV degradation, so high-quality wicker will have UV inhibitors mixed throughout the resin, not just coated on top. Cast aluminum’s resistance, however, depends entirely on its surface coating. While aluminum itself does not rust, it will oxidize (pit and corrode) if exposed. The defense is a high-performance powder coating.
A superior powder coating acts as a complete, impermeable barrier between the metal and the salt. The industry benchmark for this is the AAMA 2605 standard, which involves rigorous testing for salt spray resistance. As a comparative analysis of coating standards shows, not all finishes are created equal.
| Material | Standard Coating | AAMA 2605 Coating | Salt Resistance |
|---|---|---|---|
| Cast Aluminum | 5 years color retention | 10 years resistance to moisture, fading, and weathering | Excellent with proper coating |
| HDPE Resin Wicker | N/A | N/A | Excellent UV resistance, impervious to snow and humidity |
Ultimately, for a coastal environment, both are excellent choices. The decision hinges on aesthetics and the quality of manufacturing. For aluminum, verify it has a multi-stage, AAMA 2605-compliant powder coat. For wicker, ensure it’s 100% HDPE to prevent it from becoming brittle and cracking.
The winter cover error that causes mold growth on your expensive cushions
Investing in high-quality, waterproof furniture covers seems like the ultimate step in protecting your investment through winter. However, a common and costly error turns this protective measure into a failure-causing one: trapping moisture. Many homeowners cover their furniture at the first sign of cold weather, inadvertently sealing in dampness from an autumn rain or even ambient humidity. A standard waterproof cover is non-breathable. This creates a dark, humid, stagnant environment under the cover—the perfect breeding ground for mold and mildew.
When spring arrives, you may find your expensive cushions covered in black spots and smelling of mildew. This is a direct result of moisture entrapment. The solution lies not in avoiding covers, but in a proper pre-storage protocol that focuses on two principles: complete dryness and ensuring airflow. Before a cover is ever placed, the cushions must be 100% dry, inside and out. This may require bringing them indoors to dry near a vent or with a fan for a day or two.
Furthermore, simply draping a cover over the furniture creates contact points where condensation will form. To prevent this, it’s crucial to create an air gap. Placing a waterproof object, like an inflatable beach ball or an upside-down bucket, on the furniture before covering it creates a tent-like effect. This allows air to circulate, preventing condensation from settling on the fabric. The most advanced cushion designs also incorporate materials that actively combat water retention. For example, some high-end fabrics are inherently breathable, and innovations like reticulated foam allow water to pass through completely instead of being absorbed like a sponge.
To ensure your cushions survive the winter unscathed, implement this pre-winter protocol:
- Treat Fabric: In the fall, apply an outdoor weather shield spray like Scotchgard. This makes the cushions water and dirt repellent, providing a first line of defense.
- Ensure Complete Dryness: Use direct sunlight or indoor fans to get cushions bone-dry before storage or covering. Squeeze the cushion to check for internal dampness.
- Create an Air Gap: Place a waterproof object on the furniture under the cover to create a high point, allowing air to circulate and preventing condensation buildup.
Restoring powder-coated metal: a solution to fix chips before rust spreads
Powder-coated aluminum and steel are staples of durable outdoor furniture due to their robust and uniform finish. A powder coat is not paint; it’s a thermoplastic or thermoset polymer that is electrostatically applied and then cured under heat. This creates a hard finish that is much tougher than conventional paint. However, it’s not indestructible. A sharp impact from a dropped tool or a scrape against a stone patio can chip this protective layer, exposing the bare metal underneath. This small chip is the starting point for catastrophic failure.
Once the metal is exposed, oxidation begins immediately. For steel, this is visible as rust. For aluminum, it’s a more subtle white, chalky corrosion. If left unaddressed, this corrosion will creep underneath the edges of the surrounding powder coat, causing it to bubble and flake off. A small, treatable chip can delaminate an entire section of the finish within a single season. The key is immediate intervention. Restoring a chip is a simple process that halts the degradation in its tracks.
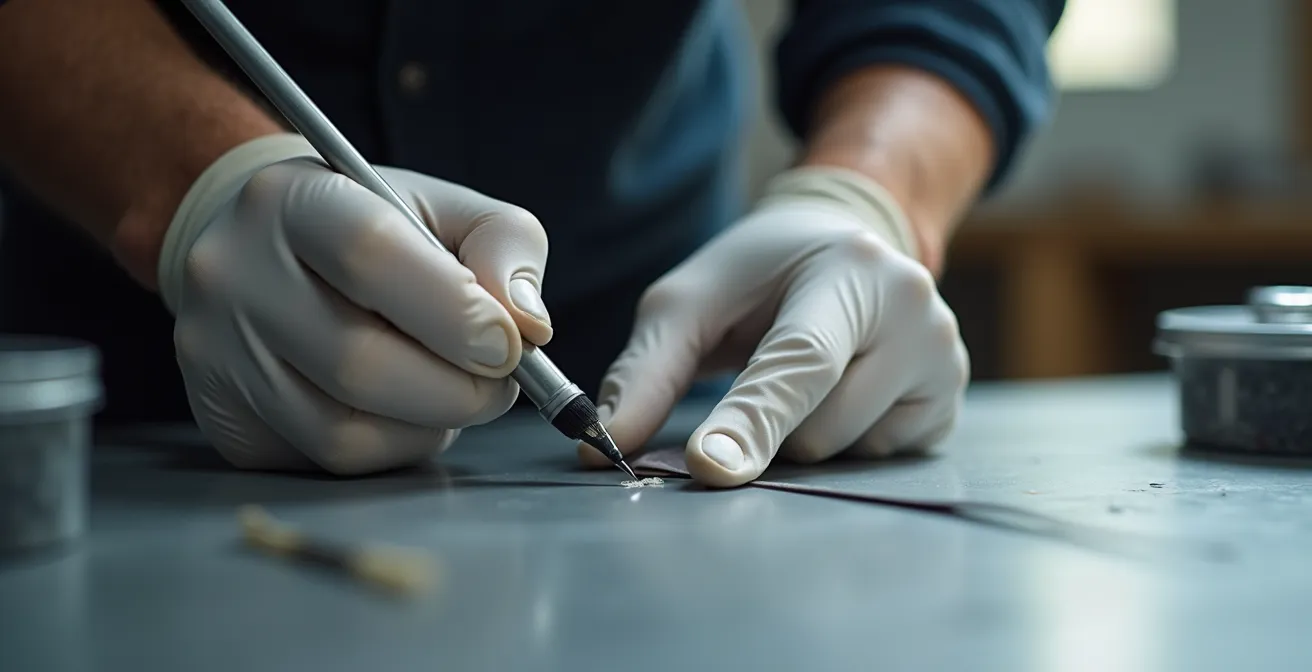
The repair process involves cleaning the damaged area, removing any loose corrosion, and applying a touch-up paint supplied by the manufacturer or a color-matched automotive touch-up pen. The goal is to seal the exposed metal from oxygen and moisture. This small act of maintenance can add years to the life of the furniture.
Case Study: Professional-Grade Pretreatment
The longevity of any coating is fundamentally dependent on what is underneath it. For maximum performance in harsh settings, professional-grade applications rely on advanced pretreatment. According to experts in industrial finishing, paint applied without proper metal pretreatment is almost guaranteed to fail prematurely. For aluminum in coastal environments, a chrome phosphate conversion coating is the most proven method. This process, which conforms to ASTM standards, creates a stable, corrosion-resistant surface for the powder coat to adhere to and is validated by over 4,000 hours of salt spray exposure testing.
The mechanical failure point to check before buying cheap modular furniture
With the rise of modular outdoor sectionals, a new and often overlooked failure mechanism has emerged: the connectors. The appeal of modular furniture is its flexibility, but that flexibility depends on the integrity of the clips, bolts, and brackets that hold the individual pieces together. In low-cost sets, these critical components are a major point of cost-cutting. They are often made from low-grade, brittle plastic or thin, poorly coated metal.
These connectors are under constant mechanical stress from people sitting, shifting, and getting up. They are also exposed to the same environmental stressors as the rest of the furniture. Plastic clips become brittle from UV exposure and can snap. Metal connectors can rust and fail, or the bolts can strip the weak threads in the furniture frame. When a connector fails, the entire sectional can become unstable and unsafe. A single broken clip can render a multi-thousand-dollar configuration unusable.
When inspecting modular furniture, the frame and cushions are only half the story. The real indicator of quality lies in the unseen engineering of its connections. High-end modular systems use robust, thoughtfully designed connectors, such as stainless steel hardware or heavy-duty, bolt-through interlocking systems that distribute stress effectively. Some top-tier HDPE furniture not only uses marine-grade stainless steel but is also highly resistant to corrosive substances and salt spray. With proper care, testing shows this type of furniture can see normal use for 5-10 years or even longer.
Your 5-Point Pre-Purchase Mechanical Audit
- Points of Contact: Identify all mechanical connection points. This includes not just the clips holding modules together, but also the hardware attaching legs and armrests.
- Material Inventory: Examine the connectors. Are they thin, shiny plastic or thick, matte-finished metal? Ask for the material specification—is it 304 stainless steel? Is it a UV-stabilized polymer?
- Coherence Check: Confront the connectors with their purpose. Does this flimsy plastic clip look like it can withstand the stress of a 250-pound person repeatedly sitting down? Does the metal have a thick, even powder coat, or is it just painted?
- Failure Potential: Actively test the connection strength in the showroom. Does it feel solid or wobbly? Look for drainage holes; a lack of proper water drainage in the frame near the connectors can accelerate corrosion.
- Integration Plan: Based on your audit, determine if the connection system is a long-term liability. If it is, no matter how good the cushions look, the piece is a poor investment.
Swimming pool vs. Outdoor kitchen: which adds more actual value to a family home?
From a property value perspective, the debate between adding a swimming pool or an outdoor kitchen is complex and region-dependent. However, from a material investment perspective, each of these high-value zones imposes distinct and demanding requirements on the furniture placed within them. The choice of furniture is not interchangeable; what thrives in an outdoor kitchen environment may quickly degrade poolside, and vice-versa. Understanding these specific environmental demands is key to making a durable investment.
A poolside area is a zone of constant water and chemical exposure. Furniture here is subjected to splashes of chlorinated or saltwater, which are highly corrosive. The primary material requirements are water and chemical inertness. This is why materials like marine-grade polymer (MGP), powder-coated aluminum, and HDPE are dominant. Fabrics must also be engineered to handle this environment, with solution-dyed acrylics being the standard for their resistance to both fading from UV and damage from chemicals.
An outdoor kitchen, by contrast, is a zone of heat, grease, and food stains. While moisture is a factor, the more pressing concerns are stain resistance and ease of cleaning. Aluminum and teak are excellent choices for frames. For cushions, stain-resistance is paramount. Tabletops made of stone or porcelain are often preferred for their durability and non-porous surfaces. The furniture here is also geared more toward dining and conversation, so comfort over longer periods becomes a more significant factor in design.
This breakdown of material requirements clarifies how the intended use-zone dictates the engineering of the furniture.
| Zone | Key Requirements | Recommended Materials |
|---|---|---|
| Poolside | Water-resistant, treated to withstand moisture | Marine-grade polymer, HDPE, Aluminum |
| Outdoor Kitchen | Stain-resistance, comfort for dining | Solution-dyed acrylic cushions, Teak, Aluminum |
In essence, the “value” of the furniture is directly tied to its suitability for its specific micro-environment. Placing a beautiful teak dining set with untreated cushions next to a saltwater pool is a recipe for rapid failure. Conversely, using simple MGP chairs in an elaborate outdoor kitchen might be functional but fail to provide the comfort and aesthetic required for a dining space.
Key Takeaways
- The initial price of patio furniture is misleading; Total Cost of Ownership (TCO) is the true metric for a smart investment, favoring durable materials over frequent replacements.
- Every material has a specific failure mechanism (e.g., rust, rot, UV degradation). The best furniture is engineered to specifically combat the primary stressors of its intended environment.
- Proactive maintenance, such as proper sealing for teak, chip repair for powder coats, and correct winter storage for cushions, is not optional—it is a required process to achieve a decade-plus lifespan.
Solar Lighting for Pathways: How to Achieve Professional Curb Appeal DIY?
A well-executed lighting plan does more than enhance curb appeal; it protects your furniture investment. At night, a dark patio is a liability. It’s easy to trip over an ottoman or scrape a chair against a stone edge when moving around in the dark, causing the very chips and damage that lead to material failure. Strategic pathway lighting is a fundamental safety feature that preserves the condition of your furniture. Modern solar lighting offers a simple, DIY-friendly way to achieve a professional look without wiring.
However, the function of lighting extends beyond simple illumination. It can be used as a design tool to highlight the very qualities you invested in. For example, installing low-voltage uplighting behind a set of aluminum chairs can showcase their clean lines and texture. For wood furniture, the color temperature of the light is critical.
Light temperature dramatically changes the perception of furniture materials at night – warm light enhances the richness of teak while neutral light highlights clean aluminum lines.
– Outdoor Design Expert, Professional Lighting Design Guide
Lighting can also play a protective role against the number one enemy of all outdoor materials: UV radiation. While pathway lights don’t block the sun, incorporating lighted structures like pergolas or large cantilever umbrellas into your design provides essential shade during the day. Many modern umbrellas even feature integrated solar-powered LED lighting, serving a dual purpose. Protecting furniture from direct, prolonged sun exposure is the single most effective way to prevent fading and material degradation, and a well-placed shade structure is a critical component of this strategy.
To integrate lighting and shade effectively, consider this strategic plan:
- Position for Safety: Place low-lumen solar pathway lights along all walkways and around the perimeter of the furniture grouping to prevent trips and accidental damage.
- Install Protective Shade: Use umbrellas, canopies, or pergolas to shield your furniture from direct sun during peak hours. This is essential for maintaining any weather-resistant material.
- Uplight for Effect: Use focused uplights to highlight the textures and forms of your furniture pieces, turning your investment into a nighttime design feature.
- Select Light Temperature: Choose warm light (around 2700K) to bring out the golden and red tones in wood like teak. Use a more neutral light (3000K-4000K) for metal and modern gray-toned furniture.
Ultimately, selecting weatherproof furniture that lasts is an exercise in engineering, not shopping. By shifting your focus from initial price to total cost of ownership and from generic material names to specific failure mechanisms, you can make a rational, informed decision. Evaluate your specific environmental challenges and choose the material engineered to defeat them to ensure your investment provides value and enjoyment for more than a decade to come.