
In summary:
- Professional solar lighting is a system, not just a product. It combines security, power management, and design principles.
- Overcome shady areas by using remote solar panels to separate light placement from power generation.
- Choose brightness (lumens) based on function—ambiance, safety, or security—not just by picking the highest number.
- Extend the life of your lights beyond one season with crucial maintenance like sealing seams and cleaning panels.
- Strategic lighting can significantly boost your home’s security and increase its real estate value.
Walk through any neighborhood after dusk, and you can instantly spot the difference. On one hand, you see pathways dotted with weak, bluish lights that create more of a runway effect than a welcoming ambiance. On the other, you see homes where light seems to wash over walkways, highlight architectural features, and create a sense of sophisticated security. The common assumption is that the latter requires a complex, expensive, hard-wired system installed by a professional. Many homeowners attempt a DIY solar lighting project hoping for a high-end result, only to be disappointed by a cheap look that fails within a single season.
The usual advice revolves around simple tips: place lights in the sun, space them evenly, and hope for the best. But what if the secret to a professional result wasn’t in the brand of light you buy, but in the strategic system you implement? The real key lies in thinking like a landscape lighting designer. It’s about understanding how to layer light for security, how to audit your property for power, and how to select the right brightness for the right purpose. It’s a shift from just placing lights to actively designing an experience.
This guide will walk you through that professional system. We won’t just tell you what to do; we’ll explain the design principles behind each step. You’ll learn how to transform dark, vulnerable corners into secure spaces, how to generate power even in a shady garden, and how to choose the precise brightness needed for every part of your exterior. By the end, you’ll have the knowledge to create a durable, beautiful, and effective solar lighting scheme that elevates your home’s curb appeal and value.
To guide you through this process, we’ve structured this article to cover every critical aspect of a designer-grade solar lighting installation. From the foundational principles of security to the final impact on your property’s value, here’s what we’ll explore.
Summary: Your Guide to Professional DIY Solar Lighting
- Why dark corners in your garden increase the risk of burglary by 40%?
- How to position solar panels to capture charge even in shady gardens?
- Lumens vs. Watts: understanding what brightness you actually need for a driveway
- The maintenance step most people skip that kills solar lights in one season
- Sequencing your lights: creating a “welcome home” effect that saves battery life
- How to install solar panels on commercial roofs without disrupting operations?
- Why homes in 5G-enabled neighborhoods are selling 15% faster?
- How Landscaping Improvements Can Increase Real Estate Valuation by 15%?
Why dark corners in your garden increase the risk of burglary by 40%?
Before we discuss aesthetics, we must address the most fundamental role of exterior lighting: security. A dark, unlit property is an open invitation. Deep shadows around windows, doorways, and gates provide perfect cover for intruders, making your home a more attractive target. It’s not just a feeling of vulnerability; it’s a statistical reality. Thoughtfully designed lighting is one of the most effective deterrents available to a homeowner. It works by eliminating hiding spots and creating the impression that a property is occupied and well-monitored.
The power of light as a deterrent is well-documented. Home security studies consistently show that well-lit exteriors significantly reduce criminal activity. In fact, properties with strategic outdoor lighting can see a dramatic drop in risk. Research confirms that there can be a 40% reduction in burglary risk with proper pathway lighting alone. This isn’t about flooding your yard with harsh, prison-yard floodlights. It’s about a technique called light layering, where different types of light work together to create a seamless shield of visibility.
A professional approach to security lighting involves multiple layers:
- Ambient Lighting: Low-level path lights create a baseline of visibility along walkways.
- Task Lighting: Brighter lights are focused on key areas like entry points, gates, and steps.
- Accent Lighting: Uplighting on trees or walls can eliminate large, dark voids where someone could hide.
By combining these, you not only make your property safer but also add depth and dimension to your landscape. The goal is to leave no dark corner unaccounted for, transforming potential vulnerabilities into beautifully illuminated features. This proactive security measure is the foundation upon which all other aspects of landscape lighting are built.
How to position solar panels to capture charge even in shady gardens?
The most common point of failure for any solar lighting project is insufficient power. The standard advice—”place panels in direct sunlight”—is useless for homeowners with mature trees, north-facing yards, or dense foliage. This challenge leads many to believe that solar is not a viable option for them. However, a professional designer doesn’t see shade as a dead end; they see it as a puzzle to be solved. The solution is to decouple the light fixture from its power source.
The most effective strategy is employing lights with a remote solar panel. This system features a separate, larger panel connected to one or more light fixtures via a discreet wire. This simple but brilliant design allows you to place your lights exactly where you need them—deep in a shady flowerbed, under a dense canopy, or on the north side of your house—while the panel sits in the one sunny spot on your property, whether it’s on a roof, a fence post, or a garden wall. This is the secret to unlocking solar power for virtually any landscape.
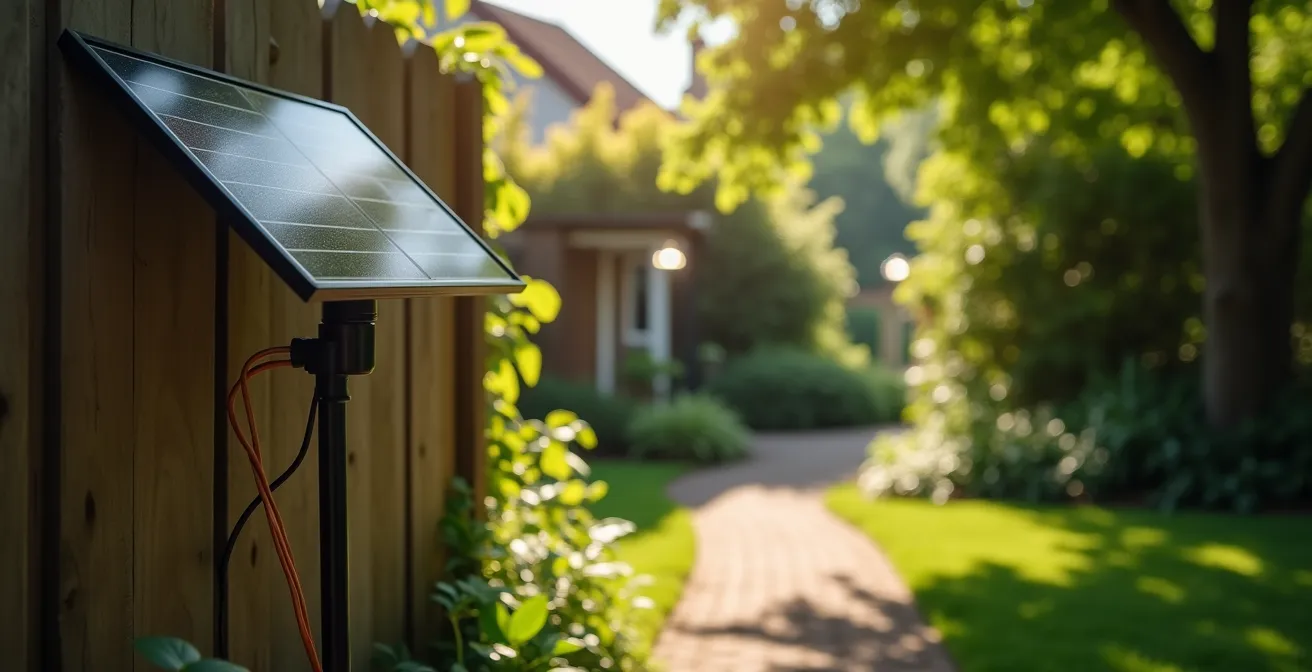
As you can see in this example, the power is gathered where the sun is abundant and delivered to where the light is needed. To maximize this strategy, you need to perform a “power audit” of your yard. Use a compass app to find south-facing areas and observe how the sun moves throughout the day. Your goal is to find a location that receives a minimum of 6-8 hours of direct, unfiltered sunlight. For optimal performance, especially during winter months with a lower sun angle, mounting the panel at a 30-45 degree angle can significantly increase its charging efficiency.
Lumens vs. Watts: understanding what brightness you actually need for a driveway
Once you’ve solved the power equation, the next design choice is brightness. In the world of lighting, buyers often get fixated on the wrong metric. With old incandescent bulbs, we thought in watts. Today, with LED and solar technology, the only number that matters for brightness is lumens. A watt is a measure of energy consumption, while a lumen is a measure of light output. A high-wattage light isn’t necessarily a bright one, especially if it’s inefficient. For solar, efficiency is everything.
The common mistake is assuming more lumens is always better. This leads to driveways that feel like airport runways and garden paths that are uncomfortably glaring. A professional designer practices lumen intentionality, selecting brightness based on the specific task of the light. Is its purpose to create a soft, romantic mood? To ensure safe navigation down a set of stairs? Or to provide clear visibility for security along a dark driveway? Each function requires a different level of light.
The following framework, used by designers, helps clarify how to match lumens to purpose. As a comparative analysis of lighting needs shows, different tasks demand different brightness levels.
| Purpose | Lumens Required | Spacing | Best For |
|---|---|---|---|
| Ambiance & Guidance | 50-100 lumens | 10-15 feet | Garden paths, decorative areas |
| Safety & Navigation | 100-200 lumens | 6-10 feet | Main walkways, stairs |
| Security & Task Lighting | 300+ lumens | 15-20 feet | Driveways, entrances |
Using this table as a guide, you can layer your lighting effectively. Use lower-lumen lights for gentle guidance along a winding garden path and reserve higher-lumen fixtures for the main walkway from your driveway to your front door. This not only creates a more visually pleasing effect but also optimizes battery usage, ensuring your lights have enough power to last through the night where it matters most.
The maintenance step most people skip that kills solar lights in one season
A solar light’s greatest selling point—its “set it and forget it” nature—is also the cause of its biggest downfall. Most homeowners install their lights and never touch them again. The result? Diminished performance after a few months and complete failure within a year or two. The truth is, while solar lights are low-maintenance, they are not zero-maintenance. A few minutes of proactive care each season is the difference between a one-season-wonder and a long-term investment. This is what I call durability engineering.
The most common failure point isn’t the LED or the panel itself; it’s water ingress and battery degradation. Rain, snow, and condensation can seep into poorly sealed casings, corroding the battery contacts and shorting out the electronics. Furthermore, the rechargeable batteries in most solar lights have a finite lifespan and their performance degrades over time, especially if they are not allowed to fully charge and discharge periodically.

Restoring and maintaining your lights is a simple process that focuses on two areas: cleaning for power and sealing for protection. A clean panel absorbs sunlight far more efficiently, and protected internals will survive harsh weather. Most importantly, don’t be afraid to open the unit and replace the batteries; they are consumable parts, and a fresh set can often bring a dead light back to life for a fraction of the cost of a new fixture.
Your Essential Solar Light Durability Checklist
- Seal the Seams: Before winter, apply a thin bead of clear silicone sealant around the seams of the light housing and where the panel meets the plastic. This is the single most effective step to prevent water damage.
- Clean the Panels: Every month or two, wipe the solar panels with a damp cloth to remove dust, pollen, and grime. For hazy or yellowed plastic panels, use a plastic polish to restore clarity.
- Check and Replace Batteries: Annually inspect the battery compartment for corrosion. Clean contacts with a small wire brush. If a light no longer holds a charge, replace the rechargeable batteries (usually AA or AAA NiMH) with new ones of the same specification.
- Perform a Conditioning Cycle: Every 3-4 months, turn the lights off for 2-3 sunny days to allow the batteries to reach a full 100% charge. This can help extend their overall lifespan.
- Clear Obstructions: Seasonally trim back any plant growth or overhanging branches that have started to cast new shadows on your panels.
Sequencing your lights: creating a “welcome home” effect that saves battery life
Once you’ve mastered the technical aspects of power, brightness, and maintenance, you can ascend to the highest level of landscape lighting design: creating emotion and telling a story. A professional installation is more than a series of disconnected lights; it’s a curated experience. This is achieved through visual rhythm and sequencing. Instead of a static, uniform grid, you create a visual journey that guides the eye—and the feet—through the landscape.
As the experts at the Home Depot note in their professional guide:
The right landscape lighting can enhance the trees, gardens or other features in your yard and provide security along a walkway
– Home Depot Landscape Lighting Guide, Home Depot Installation Guide
Think about the path from the street to your front door. A designer might start with lower-lumen lights spaced farther apart along the driveway, then increase the brightness and tighten the spacing as you approach the main walkway. This creates a natural sense of progression and arrival—a “welcome home” effect. You can also use light to draw attention to a beautiful specimen tree or a piece of garden art, creating focal points that add interest to the nighttime landscape.
Modern solar lights with smart features or multiple modes can take this a step further. Some models have a low-power “glow” mode that conserves battery, then switch to full brightness when motion is detected. By strategically placing these, you can create a dynamic pathway that lights up just ahead of you as you walk, combining energy efficiency with a touch of magic. This thoughtful sequencing is what separates a utilitarian setup from an enchanting one.
Even the simplest lights can create a powerful effect when installed with intention, as this user experience shows:
Guys, this new addition is amazing! They take two seconds to set up (Just turn on the switch on the back, let them charge in the direct sunlight, and push into the ground.) and they work so well.
– The DIY Playbook, Backyard Solar Lights Ideas
How to install solar panels on commercial roofs without disrupting operations?
While the question of installing panels on large commercial roofs might seem distant from a homeowner’s DIY project, it contains a powerful core principle: non-disruptive installation. For a business, this means not shutting down operations. For a homeowner, it means achieving a major landscape upgrade without turning your garden into a messy, disruptive construction zone for weeks.
This is where solar lighting truly outshines its traditional, hard-wired counterparts. A conventional low-voltage lighting system requires an electrician, extensive trenching to bury cables, and drilling through walls to connect to a transformer and your home’s electrical panel. It’s a costly, time-consuming, and messy process that can damage established lawns and garden beds. The recovery time for your landscape can be significant.
In contrast, a DIY solar lighting system is the definition of non-disruptive. There is no trenching, no wiring back to the house, and no need to hire an electrician. Installation is a simple matter of pushing stakes into the ground or mounting fixtures with a few screws. You can install an entire front-walkway system in under an hour, with zero damage to your existing landscape. This allows for flexibility, experimentation, and easy adjustments as your garden grows and changes over the seasons.
This efficiency is the ultimate practical advantage. It puts the power of sophisticated landscape design directly into your hands, allowing you to achieve a professional look with minimal time, cost, and disruption. You can focus your energy on the design, not the demolition.
Why homes in 5G-enabled neighborhoods are selling 15% faster?
The connection between 5G technology and home sales might seem obscure, but the underlying theme is about how modern amenities and perceived value impact the real estate market. Just as a feature like high-speed internet has become a must-have for buyers, other elements that contribute to a home’s modern appeal and functionality can dramatically influence how quickly it sells. One of the most powerful of these elements is curb appeal.
Curb appeal is a buyer’s first impression of a property, and it sets the tone for their entire viewing. A home that looks well-cared-for, secure, and aesthetically pleasing from the outside is immediately more desirable. It suggests that the interior is also well-maintained. While factors like a fresh coat of paint and manicured lawns are well-known contributors, professional-quality landscape lighting is a powerful, often-overlooked component.
A well-lit home stands out, especially during evening viewings or for potential buyers driving by after work. It communicates a sense of safety, sophistication, and attention to detail. It highlights the best architectural features of the house and the beauty of the landscape, creating an emotional connection before the buyer even steps inside. In a competitive market, this positive first impression can be the deciding factor that makes a buyer eager to see more, leading to faster offers and a quicker sale.
Just as technology infrastructure like 5G signals a modern, desirable neighborhood, a home with thoughtful, high-quality lighting signals a modern, desirable property. It’s an investment in perception that pays significant dividends when it’s time to sell.
Key takeaways
- Design for Security First: Use layered lighting to eliminate dark spots, a proven method to deter intruders and create a safe environment.
- Master Your Power Source: Don’t let shade defeat you. Use remote solar panels to capture sunlight in optimal locations and power lights wherever they’re needed.
- Be Intentional with Brightness: Choose lumens based on the specific function of each light—soft ambiance for gardens, bright safety for walkways, and strong security for entrances.
How Landscaping Improvements Can Increase Real Estate Valuation by 15%?
We’ve moved from the foundational principles of security and function to the finer points of design and aesthetics. The final, and for many homeowners, most compelling reason to invest time in a professional-looking lighting system is the tangible return on investment. A well-executed landscape lighting project is not an expense; it’s an asset that directly increases the financial value of your home.
Curb appeal is not just a vague concept; it has a quantifiable impact on property valuation. A home that presents itself as polished, secure, and beautiful from the moment you see it commands a higher price. Landscape lighting extends this curb appeal into the evening hours, effectively doubling the time your home can make a stunning first impression on potential buyers. This can be a powerful differentiator in any real estate market.
The financial impact is not trivial. Professional real estate and design analyses confirm the significant value added by well-conceived landscaping. According to industry experts, thoughtful enhancements to a home’s exterior, including strategic lighting, can be a major driver of value. In fact, real estate professionals confirm that there can be up to a 15% increase in home value and aesthetic appeal from such improvements. For a home valued at $400,000, that’s a potential increase of $60,000 from an investment of a few weekends and a modest budget.
By following the designer’s system outlined in this guide, you are not just adding lights to your garden. You are implementing a strategy that enhances security, creates beauty, and, ultimately, adds measurable value to your most significant financial asset.
Now that you’re equipped with a designer’s mindset, the next logical step is to begin planning your own professional-grade solar lighting project and transform your home’s exterior.